
D2R Terror Zones & Sunder Charms — Complete Guide (Season 14, Patch 3.2)
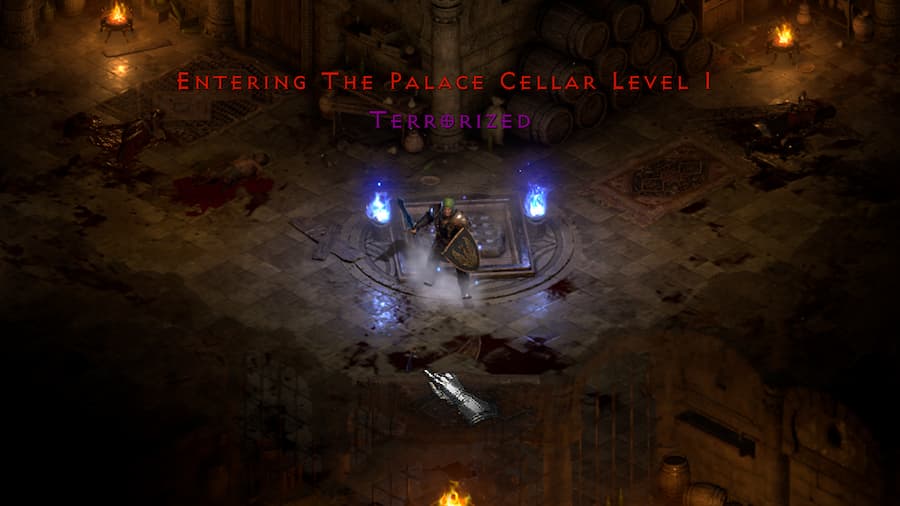
Terror Zones are the backbone of D2R's Hell-difficulty endgame, and the system around them — Heralds, Latent Sunder Charms, Renewed Sunder Charms, Worldstone Shards — got a genuine overhaul in Patch 3.2 (Season 14, live since May 22, 2026). If you last farmed seriously in Season 13, several of the rules you learned back then have changed. This covers how the whole system actually works right now, not how it used to.
What a Terror Zone Actually Is
Every 30 minutes, one random area in the game becomes "terrorized" — every monster inside scales up to monster level 99 in Hell difficulty, regardless of what the zone's base level normally is. A backwater area that's normally a waste of time can suddenly become one of the best farming spots in the game for that half hour.
That 30-minute rotation is itself a Reign of the Warlock change — it used to be 60 minutes before the expansion, so you now get roughly double the variety and don't have to wait nearly as long for a good roll.
A few mechanical details worth knowing;
- Type
/terrorizedin chat to check the current zone in-game. - Multiplayer uses a single server-wide rotation shared by everyone.
- Singleplayer uses a local seed based on your own computer's clock — it does not follow the same sequence as multiplayer. If you want to plan ahead, tools like the SP Terror Zone Calendar on d2runewizard.com or d2emu.com can show upcoming zones in advance.
- Not every zone is worth farming — the best ones combine a high base area level (85 is the ceiling), heavy elite density, and immunities your build can actually deal with. Chaos Sanctuary and Worldstone Keep are consistently cited as top picks: both sit at area level 85, both have dense elite/boss packs, and Chaos Sanctuary in particular (five seal bosses, huge density) is often called the single best Terror Zone in the game — our Hammerdin guide covers why Blessed Hammer in particular is considered the gold standard for clearing it, since it bypasses nearly every immunity in the zone.
- Watch for zone enchantments before committing — a Lightning Enchanted pack with an on-death nova can one-shot you if you're under roughly 75% Lightning Resist, for example. Check what you're walking into before you fully commit to clearing it.
Heralds of Terror
Heralds are special boss-tier monsters that only spawn inside active Terror Zones in Hell difficulty, introduced with Reign of the Warlock. They're the main reason to actually hunt Terror Zones seriously rather than just casually farm through them.
How spawning works now (Patch 3.2): This changed significantly from Season 13. The old system required building up an "Ire" meter — roughly 2% progress per elite/champion kill — before a Herald would start hunting you, which made the whole loop slow and grindy. In Patch 3.2, that's gone. Heralds now have a chance to spawn and immediately start hunting you after killing any monster in a Terror Zone, with a roughly 5-second lightning telegraph warning you before one appears, and the chance increases the more monsters you kill within that same zone. One source describes the new spawn math as a logistic function tied to how much of the zone you've cleared, rather than a flat coin-flip per kill — worth knowing if you're the type who likes understanding the exact math, though Blizzard hasn't published official numbers for that curve.
Practical tip that shows up consistently across farming guides: teleporting into unexplored parts of a zone is the single best way to trigger Heralds. Popping into a fresh room can spawn up to ~50 monsters simultaneously, each independently rolling a conversion chance — meaning a single teleport into new territory can carry something like a 40% chance that at least one of those monsters becomes a Herald. This is a big part of why Enigma is recommended on basically any non-Sorceress build doing serious Herald farming — Teleport access on a melee or summoner character turns Herald hunting from occasional luck into an active, controllable strategy. If you'd rather skip immunity/Sunder problems entirely instead of gearing around them, our D2R Warlock guide covers the Abyss/Miasma build, whose magic damage sidesteps almost every immunity in the game without needing a Sunder Charm at all.
The five Herald tiers:
- Herald of Fright — moderate HP, standard elite affixes. As of Patch 3.2, this is also where the increased chance to drop a Latent Sunder Charm now starts (previously this bonus didn't kick in until Tier 4).
- Herald of Dread — increased HP and damage, can drop runes and Herald-specific rewards.
- Herald of Fear — multiple elite affixes stacked together, high damage, strong rune potential.
- Herald of Horror — genuinely dangerous, notably improved Latent Sunder odds.
- Herald of Terror — the rarest spawn and the actual namesake of the encounter type. Boss-level difficulty, best possible rewards.
Defeating a Herald increases the tier of the next Herald that spawns, so tiers escalate as you keep clearing — though tier resets back to 1 if you exit the game or save/exit (death alone does not reset your progress, per community testing). Every Herald carries aura-based modifiers, and live reports describe two active aura effects on a given Herald, which is part of what makes them meaningfully tougher than a normal Terror Zone elite pack.
Sunder Charms: Two Separate Systems, Don't Mix Them Up
This is genuinely one of the more confusing parts of current D2R, because there are two entirely different Sunder Charm systems that both exist at the same time:
1. The original (legacy) Sunder Charms — added back in Patch 2.5 (October 2022), long before Reign of the Warlock. There are six of them, one per damage type: Black Cleft (Magic), Bone Break (Physical), Cold Rupture (Cold), Crack of the Heavens (Lightning), Flame Rift (Fire), and Rotting Fissure (Poison). These still drop today from Champion, Unique, and Act Boss monsters specifically inside active Hell-difficulty Terror Zones — this drop source hasn't changed. Since Patch 2.6 they're available in every game mode except Classic, including Single Player.
2. Latent and Renewed Sunder Charms — a brand new, separate system added with Reign of the Warlock (Patch 3.0) and tied specifically to Heralds. This is the system that got reworked in Patch 3.2, and it's almost certainly what people mean when they ask about "the new Sunder Charms" right now.
How Latent → Renewed Works
Latent Sunder Charms are the raw, uncrafted drop. As of live Patch 3.2, the biggest single change to this whole system is that Latent Sunders are no longer Herald-exclusive — they can now drop from any monster, Terrorized or not, modified by your Magic Find. Heralds still carry a meaningfully increased chance to drop one, and that bonus now kicks in starting at Tier 1 (Herald of Fright) instead of Tier 4 the way it worked in Season 13 — a huge accessibility improvement for anyone not running full farming parties. The old penalty that reduced your drop chance based on how many players were in the game was also removed in 3.2.
If you're farming outside the Herald loop specifically, Act Bosses in a Terror Zone are cited as strong secondary targets — one detailed source puts a Hell Andariel kill at roughly 350 Magic Find around a 1-in-255 chance solo, worsening to roughly 1-in-165 with more players in the game (Herald hunting for Sunders scales the opposite direction with party size, worth remembering if you're deciding whether to farm solo or grouped).
Once you have a Latent Sunder, you upgrade it into its Renewed form via a Horadric Cube recipe — see our full cube recipe guide if you want the complete list rather than just Sunder charms. The general pattern here is: Latent Charm + a Perfect Gem matching its element + a mid-tier rune + a Worldstone Shard matching the right act. For example, Renewed Flame Rift takes a Latent Flame Rift, a Perfect Ruby, a Fal Rune, and a Southern Worldstone Shard. Every Sunder Charm has its own specific gem/rune/shard combination — the pattern above is illustrative, not universal, so check the exact recipe for whichever charm you're crafting before committing materials. Our D2R runes catalog has the mid-tier runes you'll need on hand for whichever recipe you're going for.
Two things worth knowing before you craft:
- Materials are consumed, and the craft can't be undone or reversed. Treat it as a one-time roll.
- Even a poorly-rolled Latent charm is worth keeping. The immunity-breaking value on the Renewed version rolls at a fixed, perfect value regardless of how bad your Latent's roll was — so a Latent that rolled, say, a weak -83% resistance penalty still becomes a perfect -70% once it's Renewed. Never discard a "bad" Latent; the bad roll doesn't carry over.
What makes the Renewed version worth the investment: on top of the same immunity-breaking effect as the Latent charm, it also rolls up to five additional affixes from a dedicated pool — skill damage bonuses, life/mana, magic find, faster hit recovery, and more. A well-rolled Renewed Sunder Charm effectively functions like a mini rainbow facet sitting in your inventory, combining immunity removal with real stat value, which is why they're considered one of the most powerful single inventory slots in the current game.
One important mechanical note that applies to both charm types: wearing a Sunder Charm doesn't just remove the monster's immunity — it sets their resistance to that element to 95% instead of blocking damage entirely, and in exchange your own character loses a large amount of resistance to that same element. Plan your resistance gear around whichever Sunder you're running; this isn't a free lunch.
Worldstone Shards
A consumable item introduced alongside Heralds in Reign of the Warlock. Using one terrorizes an entire act — every zone, waypoint, and monster in that act becomes Terrorized for the rest of your current game session, completely overriding the normal 30-minute rotation timer. This is the tool that turns Herald/Sunder farming from "wait for a good zone to come up naturally" into "just pick the act you want to farm right now."
There are five variants, one per act (Western Worldstone Shard for Act 1, and so on through Act 5). A couple of practical notes:
- The effect ends the moment you log out, disconnect, or the game otherwise ends — it's session-only, not persistent.
- Match the shard to your build's damage type. A Fire Warlock using a Deep Worldstone Shard to terrorize Act 4 is walking straight into a zone full of fire-immune monsters — unless you already have a Fire Sunder Charm in hand, that's a self-inflicted wall, not a farming session.
- Drop rate is community-estimated rather than officially published — most guides quote somewhere around 1-in-500 from elite/boss kills in an active Terror Zone, though wiki data suggests they can drop somewhat more broadly than that from general Hell content too.
Colossal Ancients — Also Changed in 3.2
Not Terror Zone-specific, but tied into the same endgame loop and worth knowing about here: Colossal Ancient Statues can now drop from non-Terrorized Act Bosses too, not just from content locked behind an active Terror Zone rotation — removing a time-gating problem that previously forced statue farming into narrow windows. The Ancients themselves were also tuned to be more consistently challenging across different builds as part of the same patch, and the Worldstone Shard drop penalty tied to player count was removed here as well, matching the Sunder Charm change above.
Practical Farming Checklist
Pulling the above into an actual routine:
- Stack real Magic Find — 300–400% is the range most farming guides converge on for Sunder-focused sessions, since it now affects drop chance from literally any monster, not just Heralds specifically. Annihilus and Hellfire Torch are worth having on any farming character regardless of build for exactly this reason.
- Get access to Teleport if you don't already have it on your farming character — it's the single biggest lever for triggering Herald spawns via the "pop into unexplored rooms" method above.
- Use Worldstone Shards deliberately, matched to your build's damage type — don't burn one on an act full of monsters immune to the only damage you deal.
- Party up for Herald tier climbing if you can — one player clearing elites for tier progress while another opens fresh unexplored areas is a commonly cited way to push through Herald tiers faster than solo play, even though solo Sunder drop rates themselves are no longer penalized the way they were pre-3.2.
- Check the zone's enchantments before committing — an elemental-enchanted pack that conflicts badly with your resistances (Lightning Enchanted without enough Lightning Resist, for instance) can turn a good farming zone into a death sentence.
- Never throw away a bad Latent Sunder Charm. Craft it — the Renewed version fixes the roll.
- Consider Insight on your mercenary for long farming sessions — solving mana sustain outright means you're not stopping every few packs to manage resources during a long Herald hunt.
Continue Reading: More D2R Guides